オプション1:Bluetooth経由
PiAware7.0以降と対応可能なブラウザーがあれば、Bluetooth経由でPiAwareを設定できます。
対応可能なブラウザー:Google Chrome、Opera、Microsoft Edge、Android版Chrome
申し訳ございません。このブラウザーではBluetoothがサポートされていません。現在対応可能なブラウザー:Google Chrome、Android版Google Chrome、Opera、Microsoft Edge
Bluetooth経由で設定する
オプション2:手動設定
オンボードWiFiまたはUSBアダプターでインターネットに接続している場合は設定ファイルを編集する必要があります。Etcherはフォーマット完了後、マイクロSDカードを排出します。マイクロSDカードまたはUSBアダプターを物理的に取り出し、再度コンピューターに差し込んで設定ファイルを編集します。
設定ファイルではユーザーが以下の設定を行うことができます
- 有線ネットワーク
- 無線(WiFi)ネットワーク
- PiAwareは暗号化されていないネットワークや暗号化されたWPA/WPA2ネットワークに対応しています;WEPは非対応
- 自動または手動アップデート*
- マルチラテレーション(MLAT)出力*
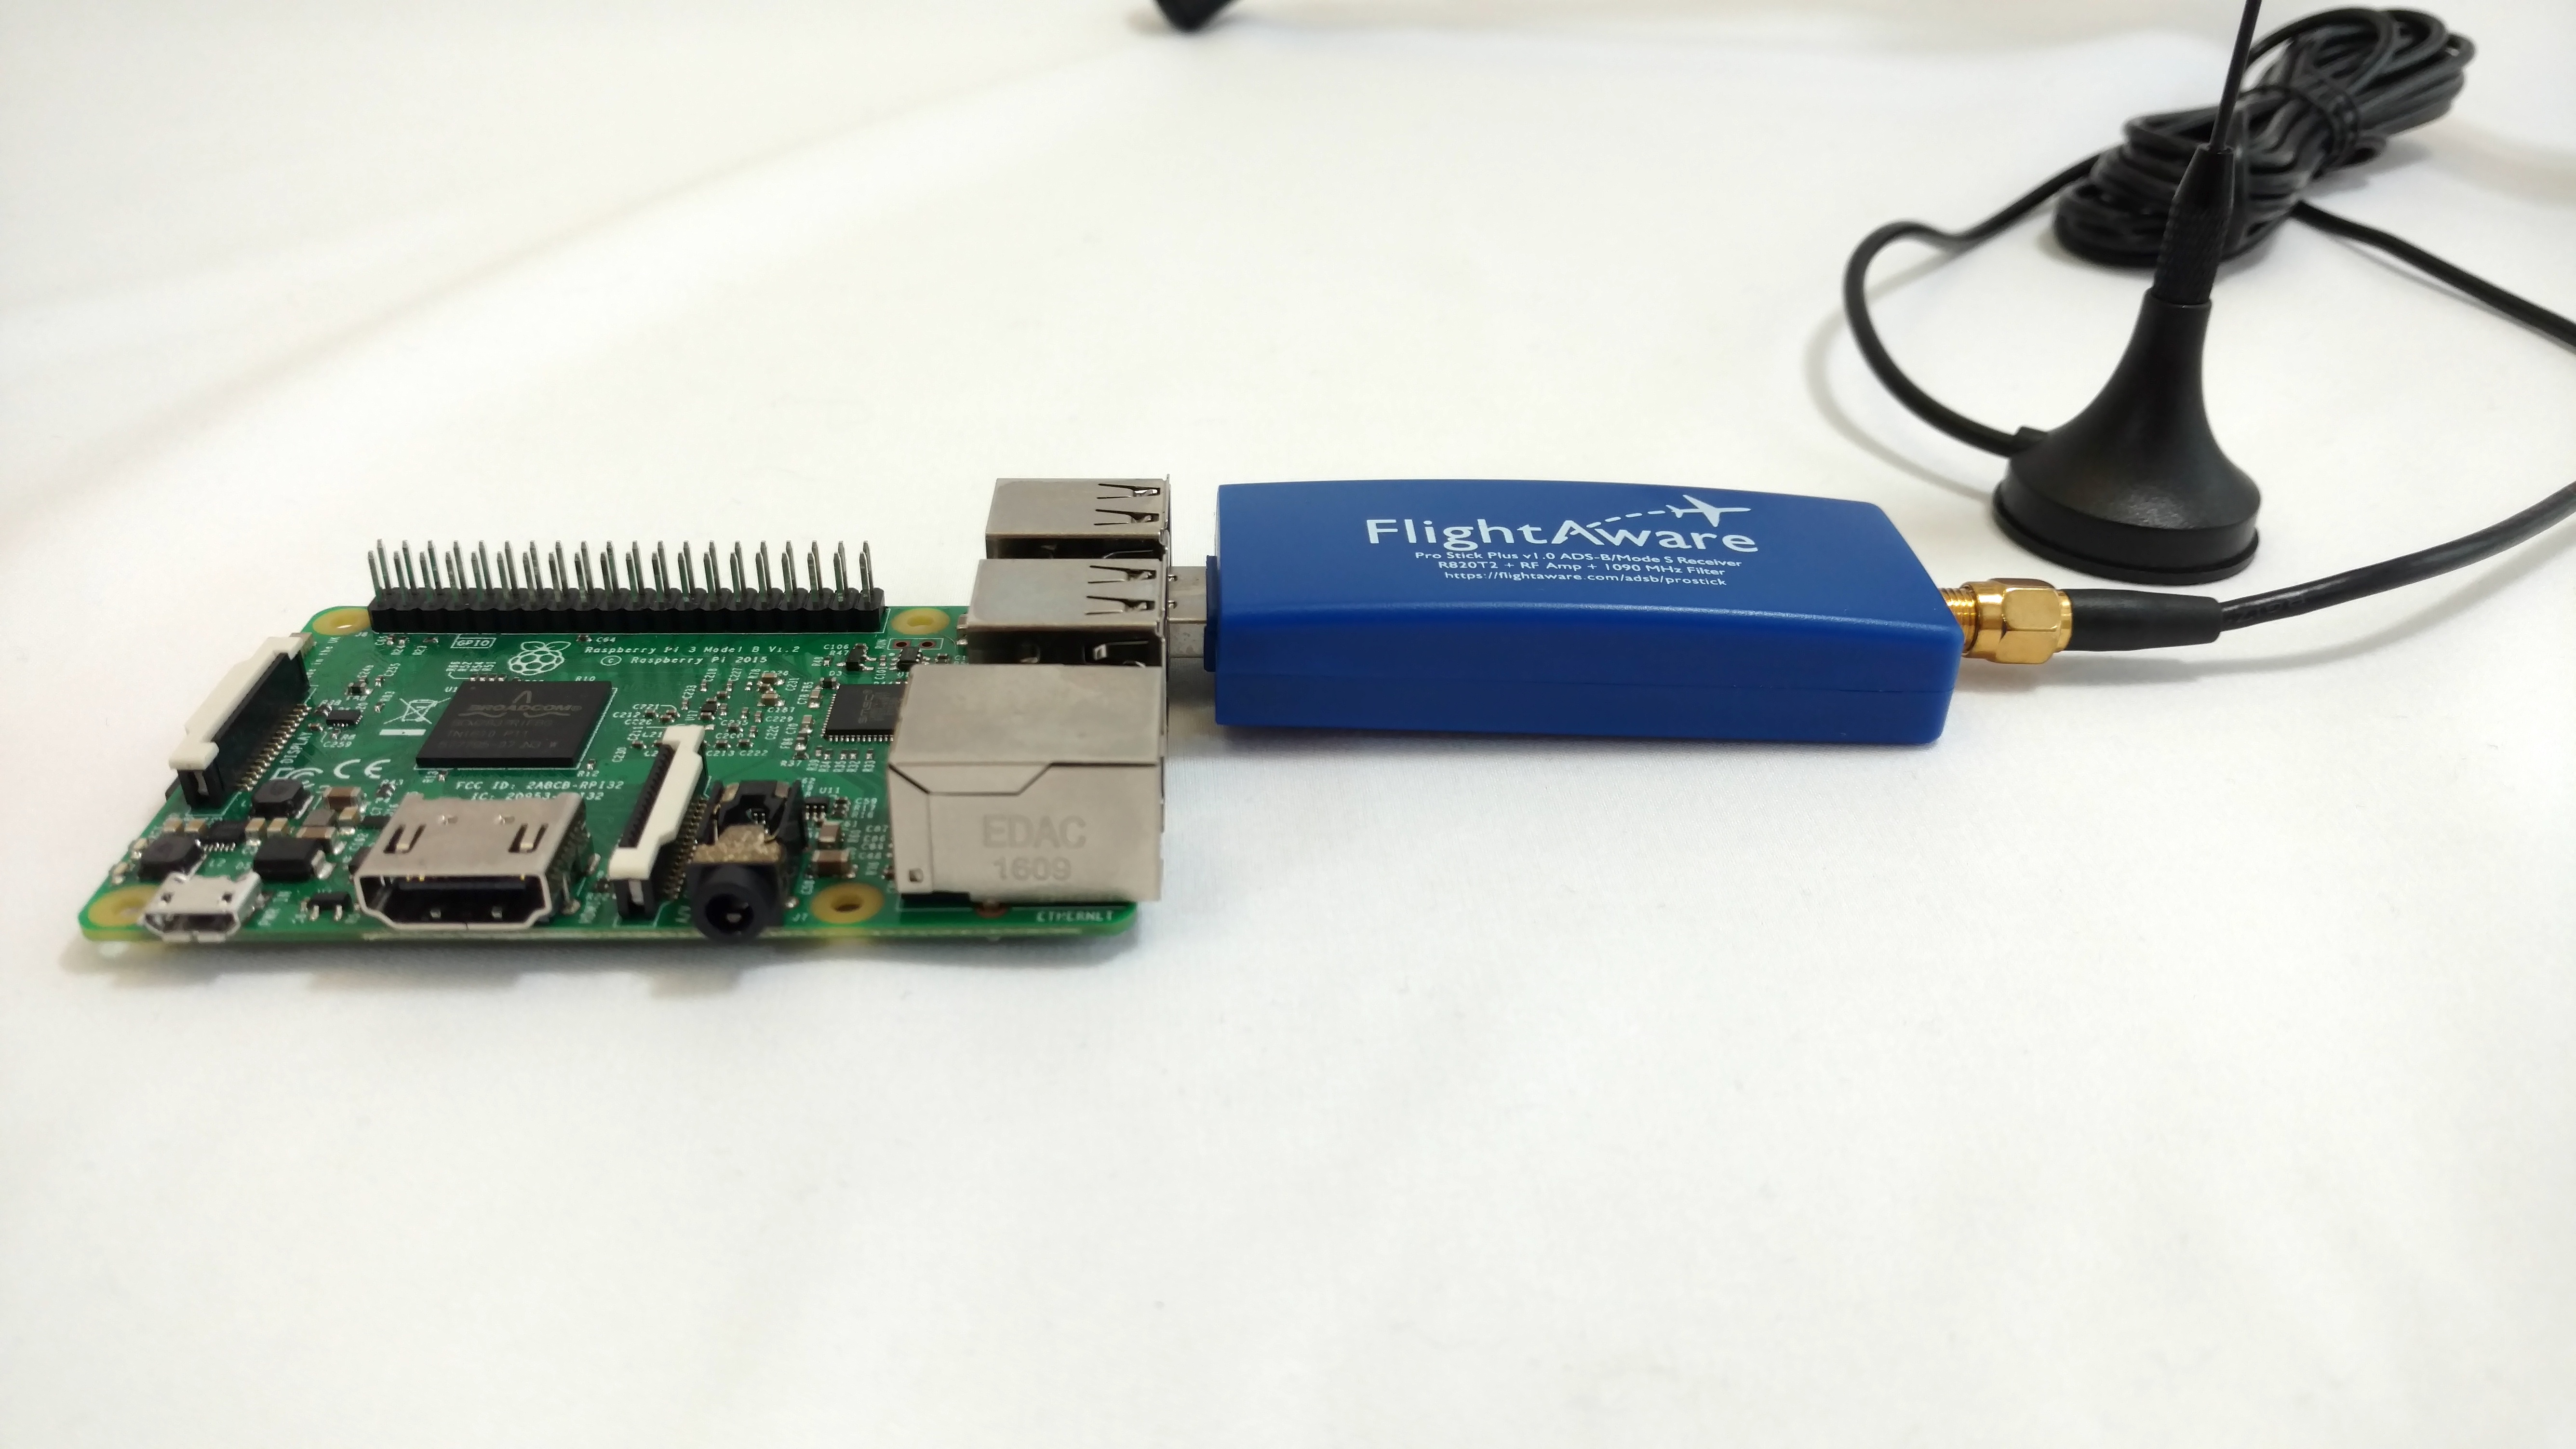
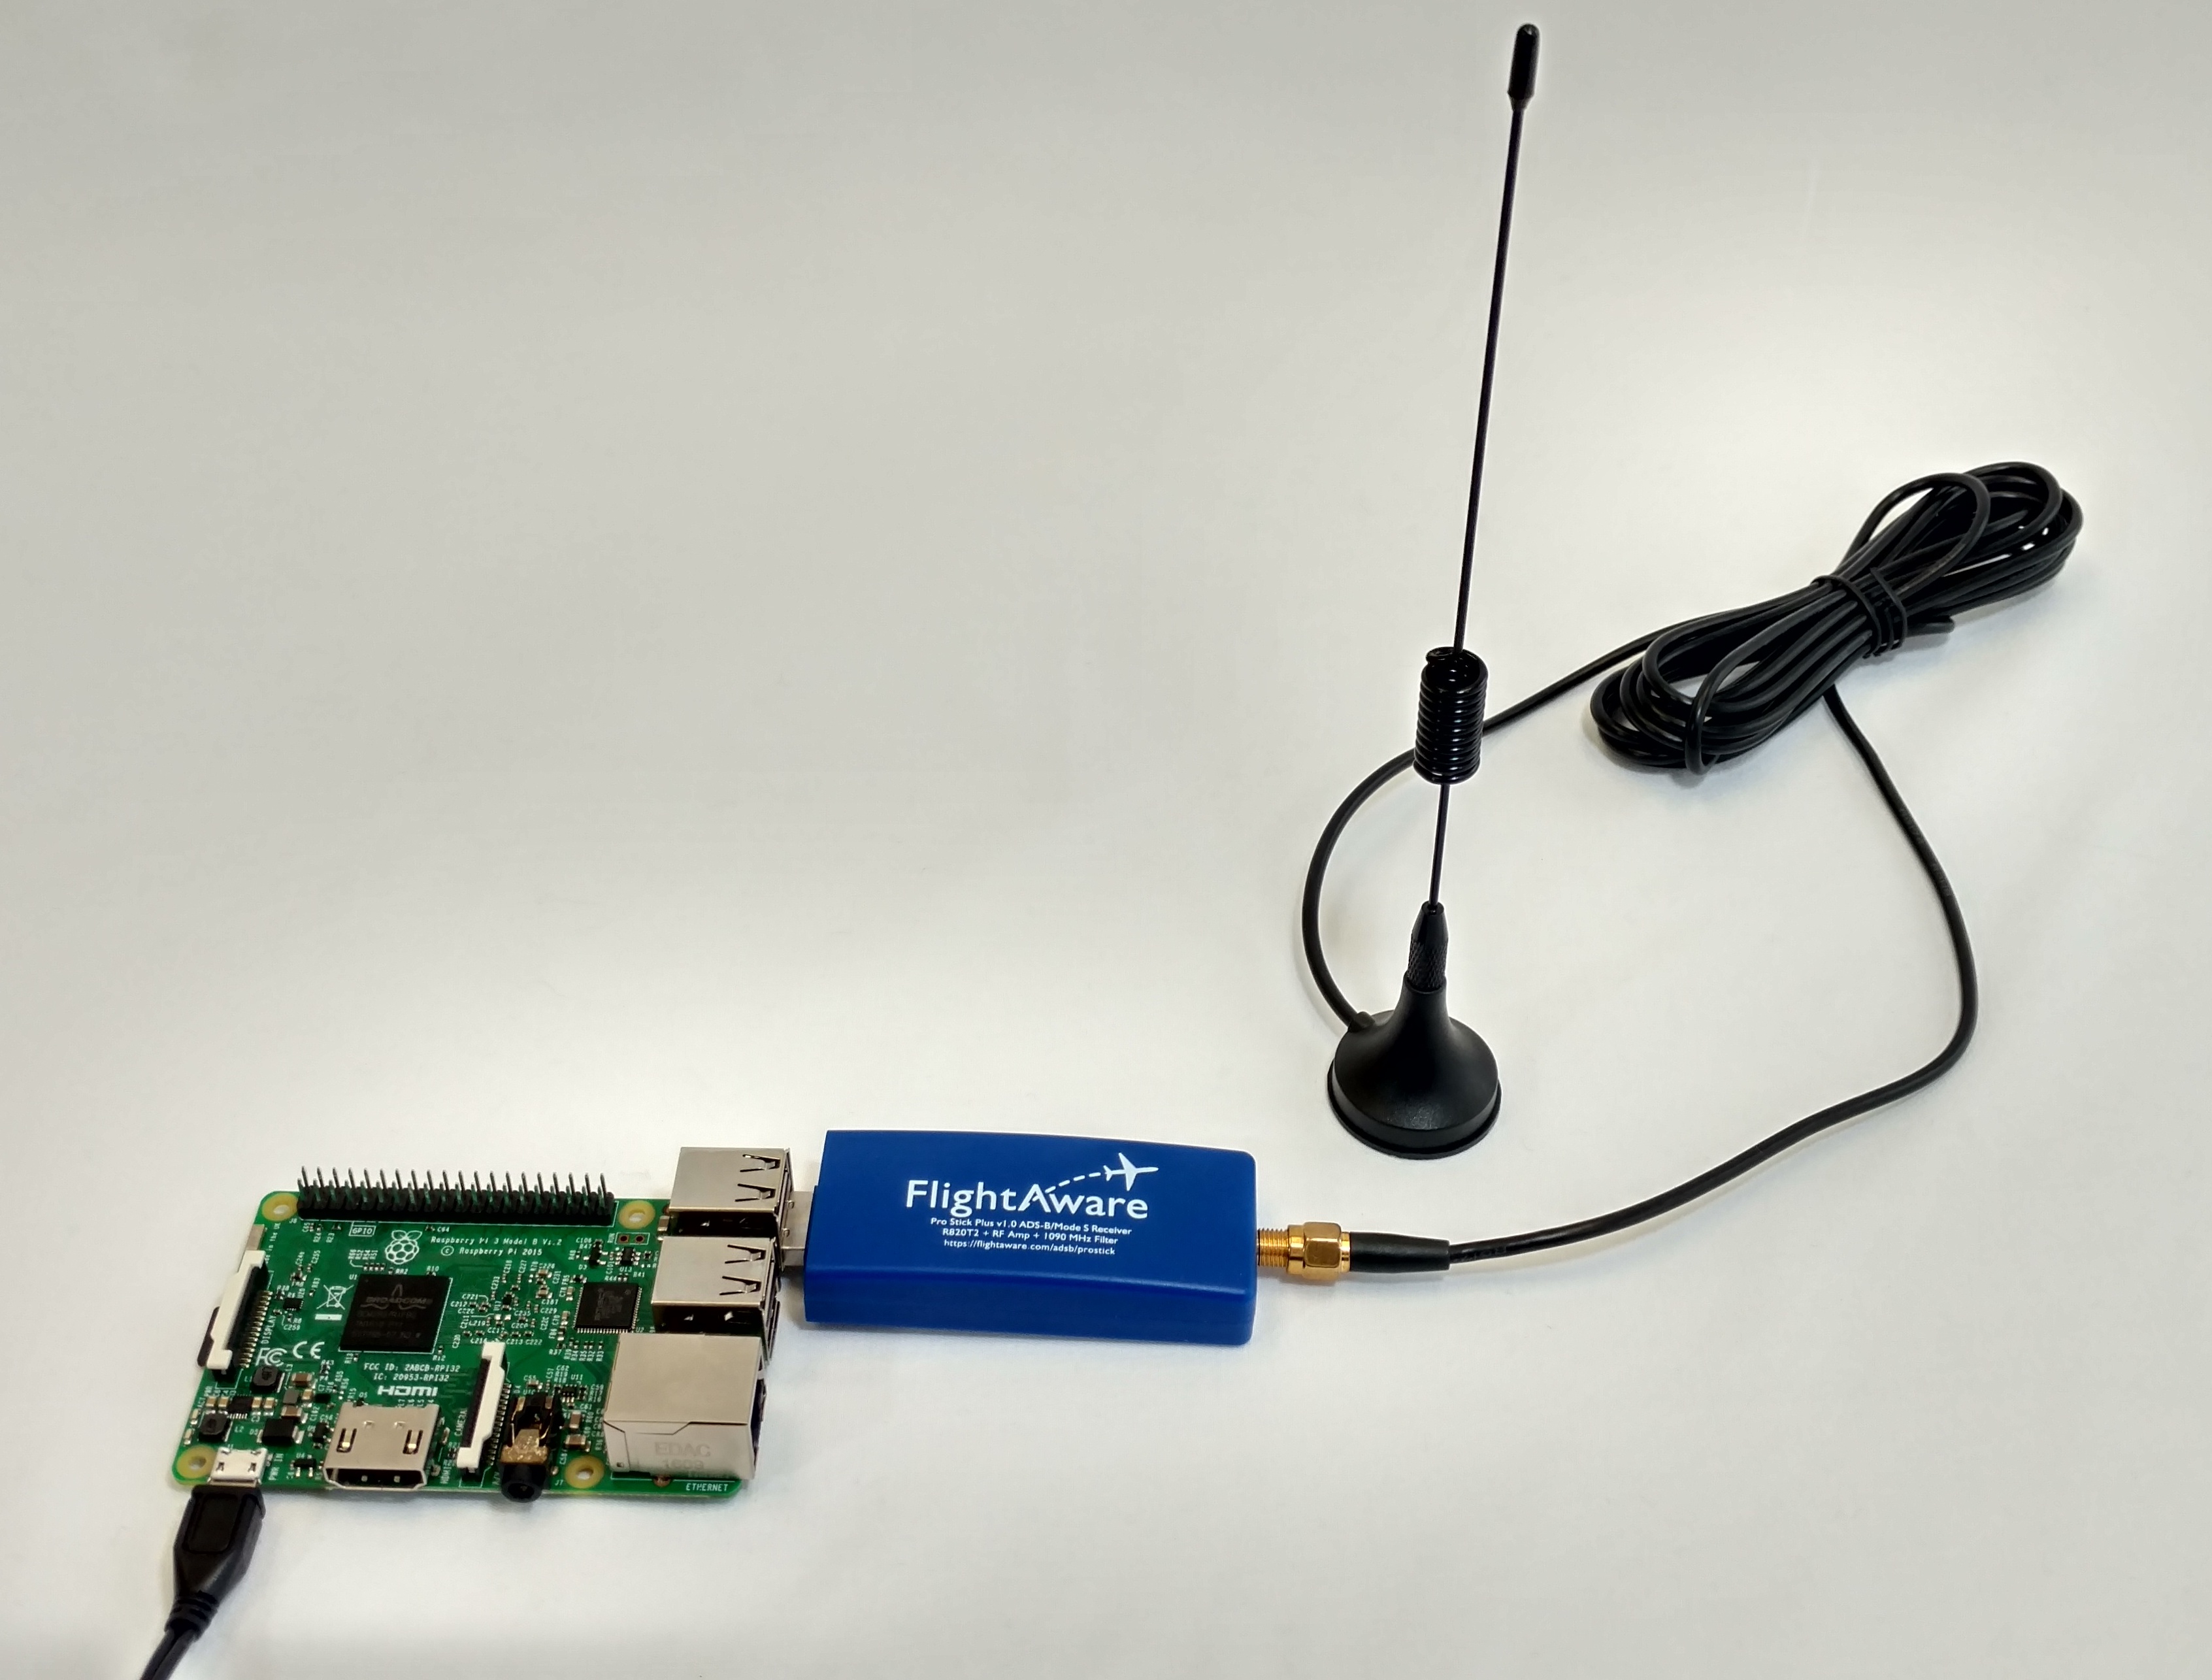
- 受信機タイプ(RTL-SDR、Beast、Radarcapeまたは他のMode S/ADS-Bソース)
- RTL-SDRゲイン、PPM、デバイスインデックス
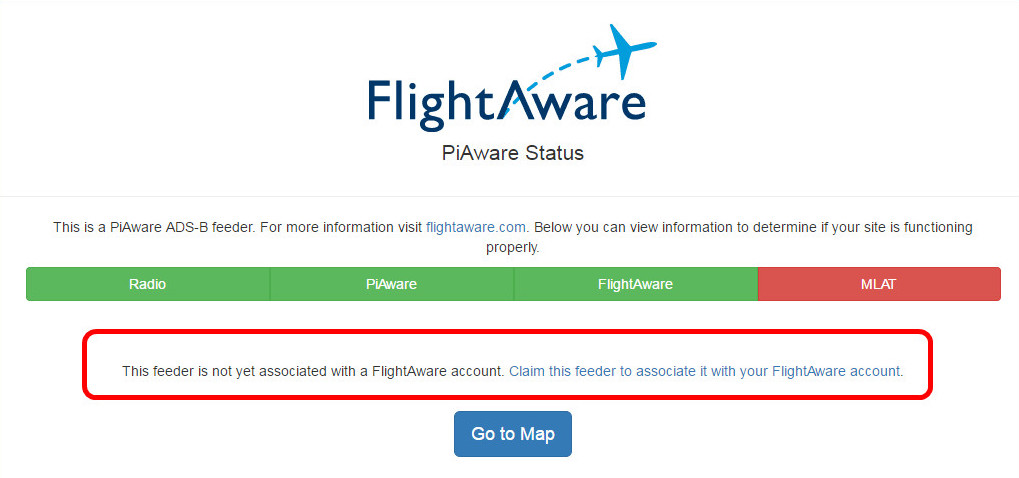
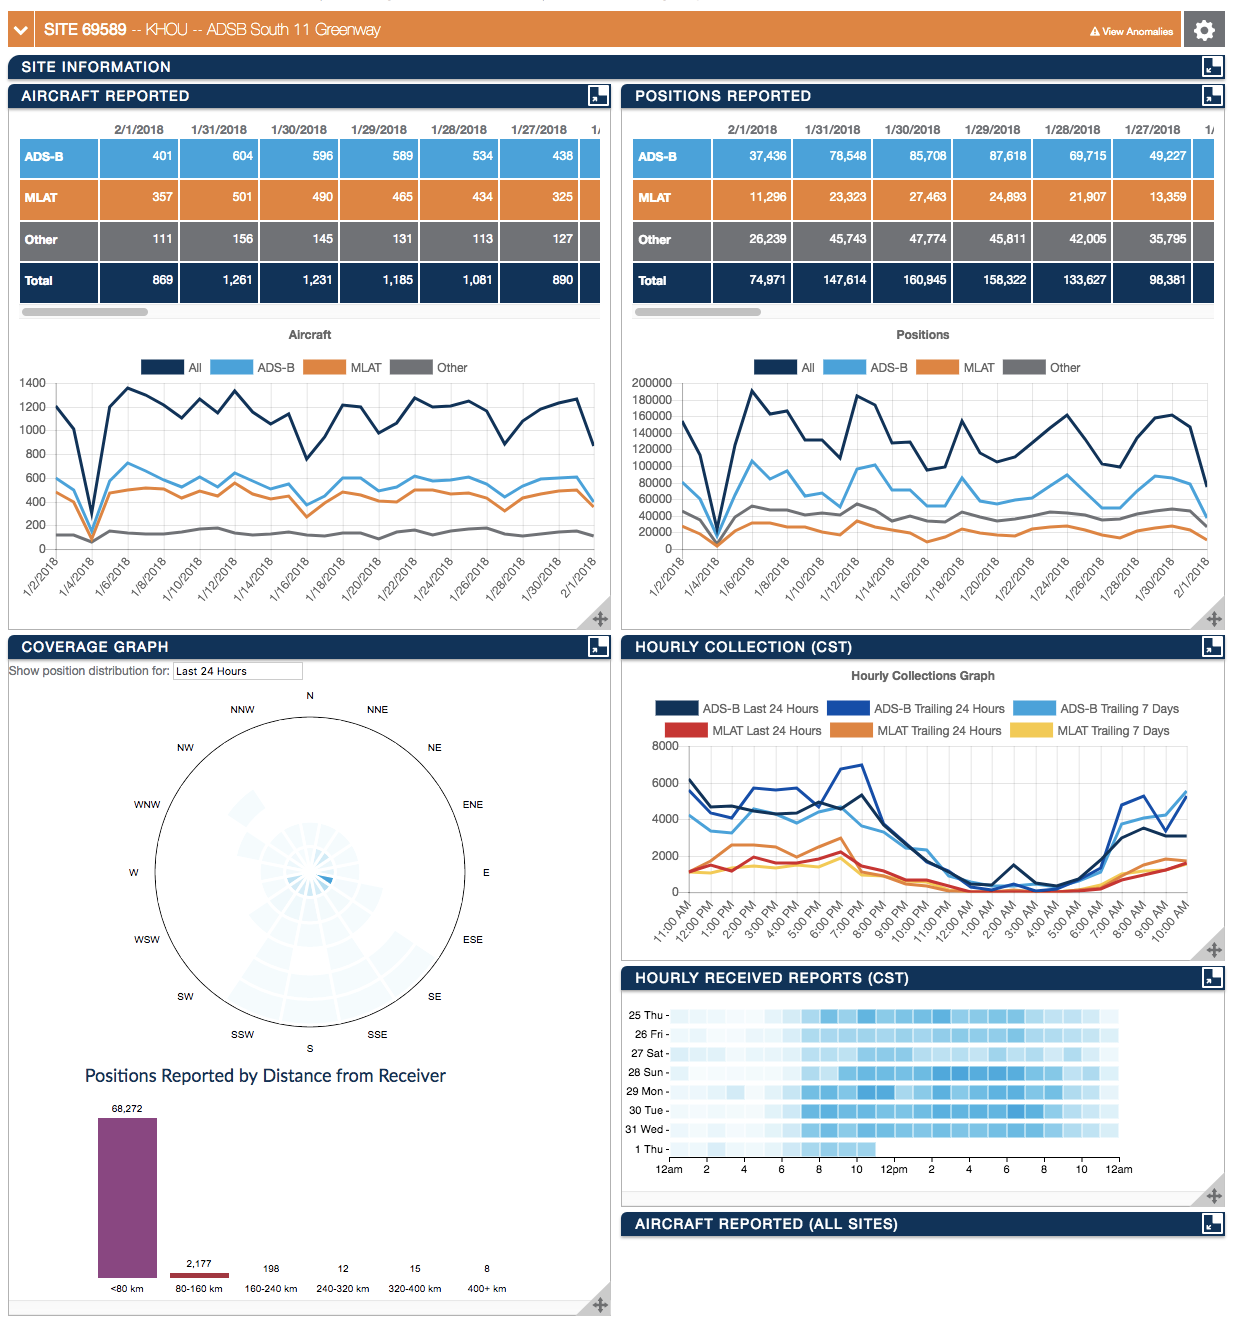
*サイトの統計ページで設定可能な項目を表示します
全般設定オプションについては、 高度な設定 をご覧ください
設定ファイル形式
設定ファイルはシンプルなテキスト形式のファイルです。MAC OSのTextEditプログラムはスマートクオート機能があり、リッチテキスト形式で保存されますので、必ずこれらのオプション設定を無効にしてください。
「#」で始まるライン(文)はコメントラインですので無視されます。空白ラインも無視されます。その他のラインは設定を定義するものです。
Windows
- エクスプローラーを開きます
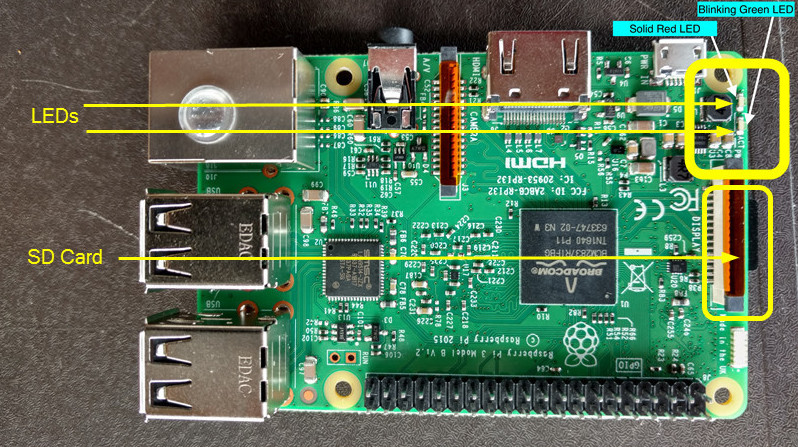
- PiAwareと名前の付いたマイクロSDカードデバイスを選択します
- piaware-config.txtという名前のファイルを開きます
- ファイルはNotepad(メモ帳)で開きます
Mac Os X
- Finderプログラムを開きます
- PiAwareと名前の付いたマイクロSDカードデバイスを選択します
- piaware-config.txtという名前のファイルを開きます
- ファイルはTextEditで開きます
以下は開いているテキストファイルです。WiFiを有効にする方法は太字で表示されています。
#
# This file configures the Piaware sdcard image
# configuration. Whenever the system boots, this
# file is read and its contents are used to
# configure the system.
#
# Lines beginning with a '#' are comment lines
# and are ignored. Blank lines are also ignored.
# All other lines specify configuration settings.
#

#
# WIRED NETWORK CONFIGURATION
#
# Should piaware use the wired ethernet port
# for network access?
wired-network yes

# Wired network configuration:
# Most networks will use DHCP
wired-type dhcp

# Alternatively, a static address configuration
# can be provided; set "wired-type" to static to use this.
wired-address 192.168.1.10
wired-netmask 255.255.255.0
wired-broadcast 192.168.1.255
wired-gateway 192.168.1.254
wired-nameservers 8.8.8.8 8.8.4.4

#
# WIRELESS NETWORK CONFIGURATION
#

# Should piaware use a wifi adaptor
# for network access? You will need to attach
# a supported USB wifi adaptor for this to work.

# change this to "yes" to enable wifi
wireless-network yes

# Wifi SSID and password.
# This should be changed to match your wireless
# network SSID and, for networks that require
# a passphrase, the passphrase.
wireless-ssid MyWifiNetwork <-----replace MyWifiNetwork with the name of your WiFi (aka the SSID of your local network)
wireless-password s3cr3t <-----replace s3cr3t with the password to your WiFi

# Wifi network configuration:
# Most networks will use DHCP
wireless-type dhcp

# Alternatively, a static address configuration
# can be provided; set "wireless-type" to static to use this.
wireless-address 192.168.1.10
wireless-netmask 255.255.255.0
wireless-broadcast 192.168.1.255
wireless-gateway 192.168.1.254
wireless-nameservers 8.8.8.8 8.8.4.4
Windows
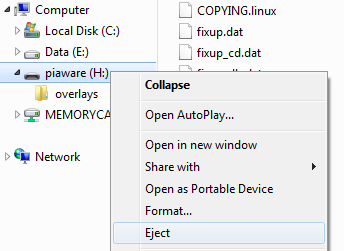
- ファイルの編集終了後、保存してNotepad(メモ帳)をとじてください
- システムトレーまたはマイコンピューターでマイクロSDドライブを右クリックして取り出すを選択し、カードを取り出します。
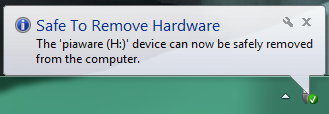
- SDカードを取り出せる状態になったことを知らせるポップアップが表示されます
Mac Os X
- ファイルの編集終了後、保存してTextEditを閉じてください
- Finderまたは取り出しアイコンを使用してマイクロSDカードを取り出してください。